Project
SSD1315 with a Seeeduino Xiao
A small Valentine's gift with a SSD1315 display.
Parts
- Seeeduino Xiao
- SSD1315 (Datasheet)
- Voltage Regulator
- Small Battery holder
- breadboard
- Small Heart shaped case
Skills & Tools
- Arduino
- Linux
- C
- Test Driven Development (TDD)
Narrative
A couple years ago, as a small Valentine's day gift for my wife I decided to make her an electronic display with a Valentine's message. The Xiao offers a I2C interface to the SSD1315 display.
I2C is a serial bus which uses two wires to communicate. It is low speed, low power, and has a simple multidrop architecture. It is commonly used for peripherals such as displays, sensors, and minor memory chips.
A stumbling block I encountered was that the Arduino libraries were for the similar (but not identical) SSD1306. Looking at the SSD1306 Datasheet and the SSD1315 Datasheet, I determined:
The next step was to add some text to the display. I used the Adafruit GFX library to draw text and
I leveraged font8x16.h and built a simple message pretty easily.
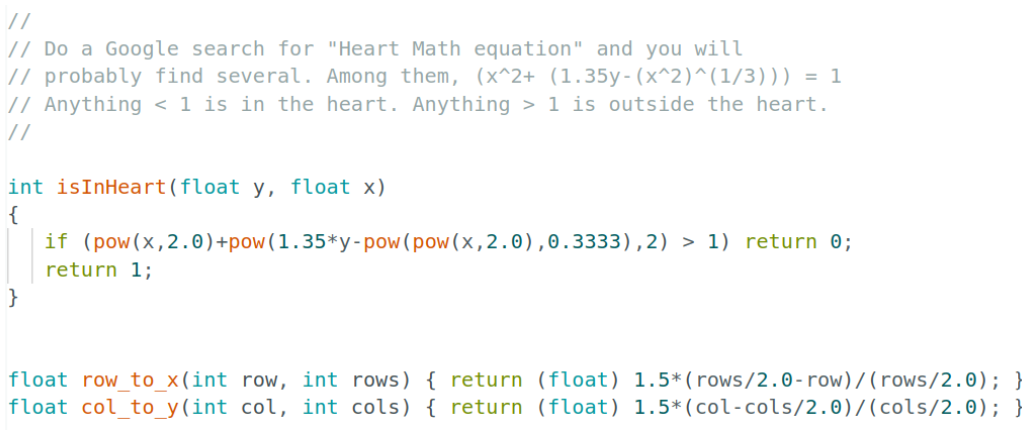
Since this is a Valentine’s day gift I’d like to do a graphic heart. Since the graph assumes a grid centered at the origin and my display assumes a grid with the origin at the top left, I had to adjust the formula to get the heart to look correct.
To power the device, I used a 9V battery and a voltage regulator to get me down to 3.3V.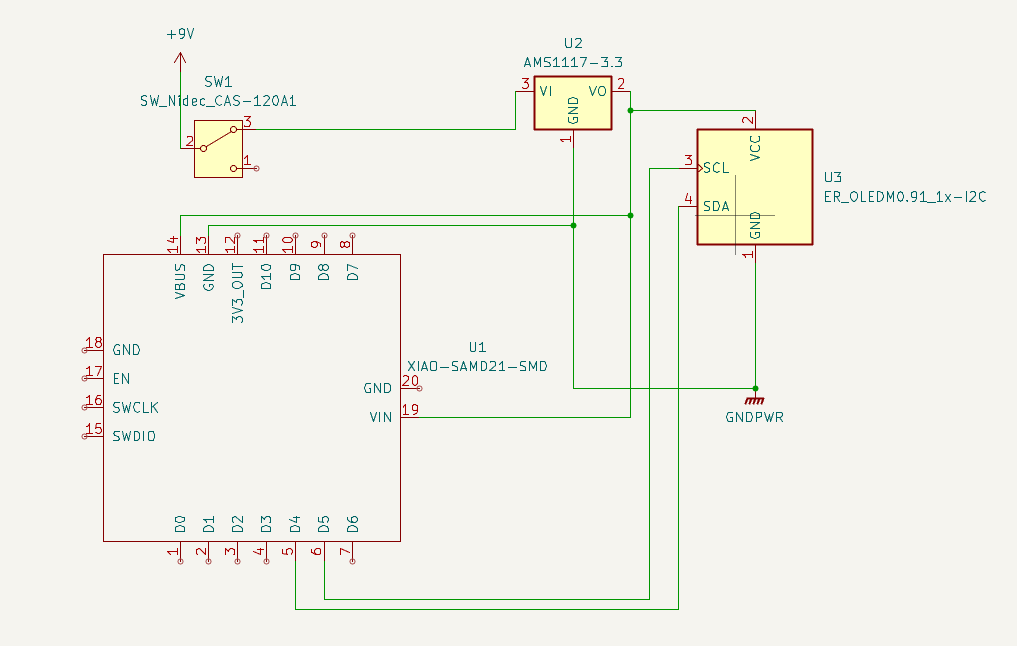
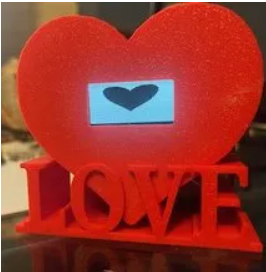
The final product came out very well and I was very happy with the result.
What went well:
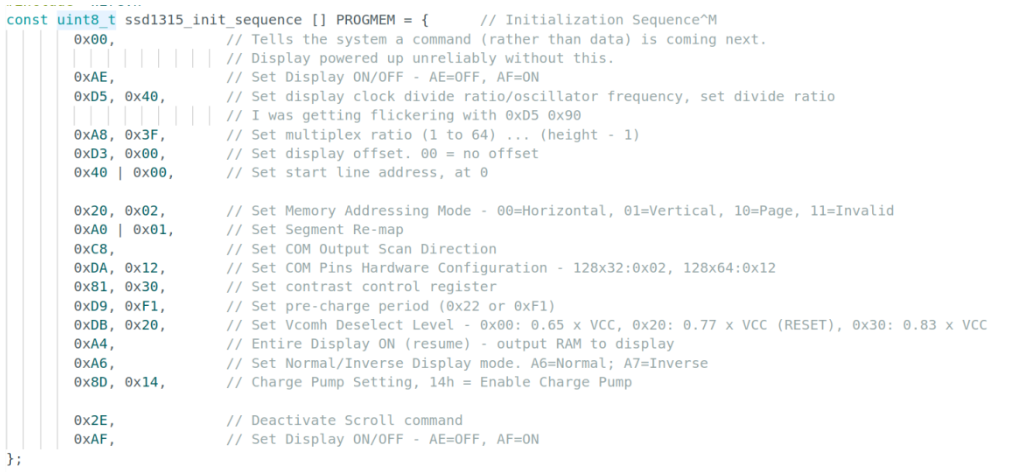
A stumbling block I encountered was that the Arduino libraries were for the similar (but not identical) SSD1306. Looking at the SSD1306 Datasheet and the SSD1315 Datasheet, I determined:
- 1306/1315 is the controller chip number. The display itself is the same and they just named the assembly after the controller chip.
- There is no more memory on the chip than the size of the display. There is a lot of talk about “pages”, but those are columns of 8 pixels. The 128×64 display is a 128-pixel wide group of eight “pages” of 8 bits each (the LSB is the top of the page). That is surely done so you can render text fonts horizontally.
- The differences were in the charge pump control and a couple scrolling commands. Those shouldn’t impact us. A charge pump is used when you need a higher voltage than the supply voltage but only for a very short period of time (such as programming a flash).
| Fixed Settings |
|---|
 |
Since this is a Valentine’s day gift I’d like to do a graphic heart. Since the graph assumes a grid centered at the origin and my display assumes a grid with the origin at the top left, I had to adjust the formula to get the heart to look correct.
To power the device, I used a 9V battery and a voltage regulator to get me down to 3.3V.
The final product came out very well and I was very happy with the result.
What went well:
- Bringup of I2C interface. I2C is pretty robust (although slow, but it has its reasons for that).
- The heart and fonts worked very well. Speed of the microcontroller was more than adequate for my needs.
- Using Test Driven Development (TDD) really helped. I have a rule with embedded systems that you test as little of the embedded software on the embedded system as you can.